
If you use an online platform like Github to host your project’s source code and want to improve its reception, then this post is for you.
It is often said that a picture is worth a thousand words. But if a picture is worth a thousand words, a video is worth a million.
In a time when humans have smaller attention spans than goldfish and nobody has got time to read hundreds of lines of readme text, one of the most effective ways of promoting your project is to include a small demo video of your project in the readme file.
How to do that is the subject of this blog post.
Firstly, we’ll need to record a video showing the project in action.
There are many custom screencasting solutions available for doing that.
However, most of them have some problem or the other, or are available for a single platform only.
Which is why I use ffmpeg.
The reasons for using ffmpeg over other solutions are:
- It is cross-platform, which means that the same command can be used on all platforms with just a little tweaking.
- It is a standard tool for general-purpose multimedia editing and can be used for tasks other than screencasting.
- It is extremely configurable.
- It is free and open-source.
My workflow for screencasting using ffmpeg on Ubuntu 16.04 is as follows:
1. Record screen
No shit, Sherlock ?
The following command can be used for recording screen while performing the demo:
ffmpeg -f x11grab -s $(xrandr | grep '*' | awk '{print $1}') -framerate 15 -i :0.0 -c:v libx264 -preset veryslow -qp 0 recording.mp4
Explanation:
x11grab– The X11 video input device.$(xrandr | grep '*' | awk '{print $1}')– Returns the screen resolution (in my case it returns1366x768). You can also hardcode the screen resolution –-s 1366x768.-framerate 15– Sets the recording framerate to 15 fps, which provides a good tradeoff between size and quality of the resulting screencast.-i :0.0–:display_number.screen_numberspecifies the X11 display name of the screen to grab from. The environment variableDISPLAYcontains the default display name.-c:v libx264– Use thelibx264video codec.preset veryslow– A preset is a collection of options that will provide a certain encoding speed to compression ratio. Read this for more information.-qp 0– Sets the quantization parameter. A value of0makes the recording output to be lossless. We need lossless screen recording as we’ll be compressing it during the final encoding, so there is no need to do that now.recording.mp4– The path of the output file.
2. Extract individual frames from the recorded video.
It is highly likely that you’ll have to remove/edit a few frames from the recorded video.
For doing that, we’ll first need to extract the individual frames from the video.
The following command can be used for the same:
ffmpeg -i recording.mp4 images/output_%04d.png
It will extract the frames inside a directory named images. (Make sure that the directory exists already!)
Note: There should be framerate * length images inside the directory.
3. Remove unwanted frames
We can now just manually delete any unwanted images from the ones extracted in the previous step to prevent them from appearing in the final video.
4. Combine frames back to video
After having removed all the unwanted images from the screencast, it is time to combine the remaining frames to form the final demo video.
This command will do the trick:
ffmpeg -framerate 15 -pattern_type glob -i 'images/*.png' -c:v libx264 -pix_fmt yuv420p -crf 35 -preset veryslow demo.mp4
Explanation:
-framerate 15– Display 15 frames per second in the output video.-pattern_type glob– Enables globbing while specifying the input files.- images/*.png– The path of the input image files.-c:v libx264– Use thelibx264codec.-pix_fmt yuv420p– Required for QuickTime and most other players. These players only supports the YUV planar color space with 4:2:0 chroma subsampling for H.264 video.-crf 30– Constant Rate Factor is an option that gives us the ability to choose the tradeoff between size and quality. The range of the quantizer scale is 0-51: where 0 is lossless, 23 is default, and 51 is worst possible.preset veryslow– Already explained above.demo.mp4– The path of the output file.
The output video generated by now should be ready to be included in the readme file.
But first, we need to upload it to some video-hosting website. You can use any platform you want; I used Youtube.
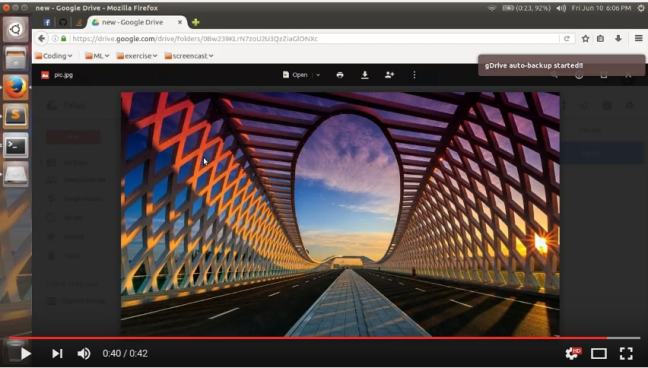
Now, instead of straightaway putting the link of the video into the readme, we can instead use a screenshot of the video being played on Youtube so that the screenshot contains the play button and other such controls present on Youtube.
By including such a screenshot, the viewer would instantly get a visual cue that the image is actually a playable video.
See this for example.
And that’s all folks!
Now your project should be ready for the interwebz!
In case you want to generate gif animations rather than videos, I have experienced that the gif’s produced by ffmpeg during screencasting are too huge to be uploaded online.
So, if you want to generate smaller gif images, byzanz-record could be the tool for you.
The basic usage goes like this:
byzanz-record /path/to/out.gif
However, if you want a finer control over the recording, such as adding a delay before the recording starts, and getting notified when the recording starts/stops, this script could be of some use to you.
This method has some disadvantages though:
- The colours in the animation might be a bit off in some cases, although it is more than compensated by the reduction in size.
- GIF images are in general larger than the corresponding mp4 files of the same quality and running time.
- GIF images are best suited for animations with running time less than 20 seconds. (Many gif hosting sites actually have such length restrictions).
TIP: You can compress the resulting gif images even further by using the excellent tool gifsickle – gifsicle -U in.gif -O3 -o out.gif.

Thanks for a great read
LikeLike